I took photographs of various plants and flowers for beauty, and cigarette packets, litter and spiderwebs for beast.
These are my final two images.
 |
| Beauty |
 |
| Beast
I edited both my original images in Photoshop to improve their visual appearance and create some emotion in the images.
Beauty

This is the original of my image. I think it looks quite dark and dull, so I want to try and brighten it up a bit.

I started by changing the Brightness & Contrast.
Image> Adjustments> Brightness & Contrast.
I increased the Brightness to 15 and the Contrast to 48. I did this to try and give it a more cheerful tone as I'm trying to show beauty.
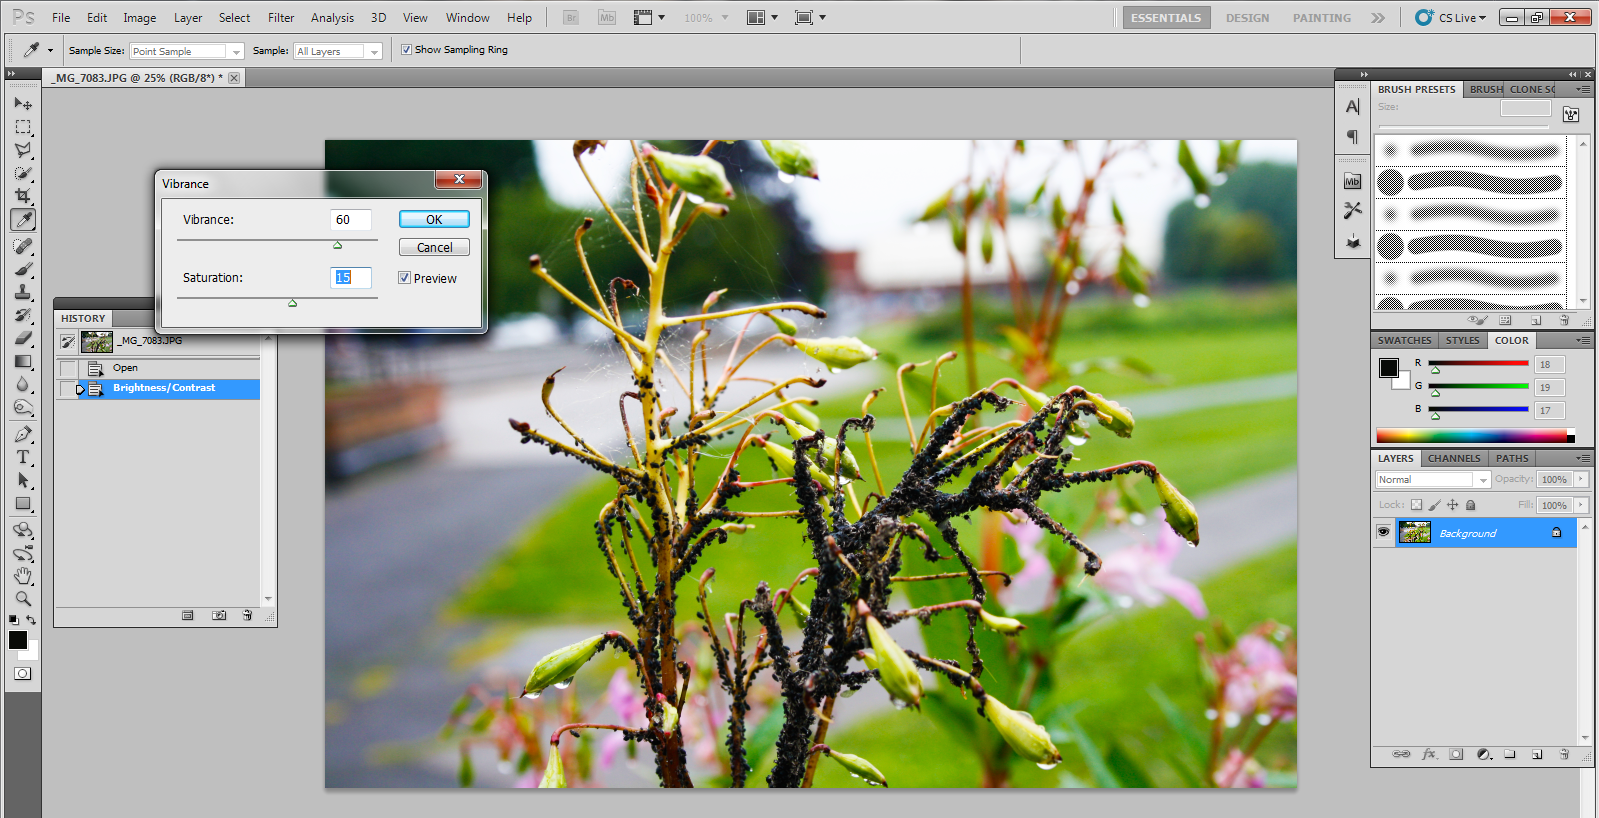
Image> Adjustments> Vibrance.
I wanted to increase the vibrancy and the saturation to make the colours stronger and for a warmer tone, so I changed the Vibrance to 60 and the saturation to 15.

I duplicated the layer...
 I did this so that I could apply the High Pass Filter.  I then applied the High Pass Filter. Filter> Other> High Pass. I applied a high pass filter because I wanted to sharpen the image so that you could see the fine details in the image more clearly, as there is a lot of detail on the plant. I changed the Radius to 4.0 pixels because I thought this suited the image.  I then merged the layers down into one layer.  Then I cropped the image down because I thought there was a lot of extra space around the photo that I didn't need.  I then created a new layer. I selected the colour square and used the dropper tool to chose a colour and I used part of the plant in the image to find the colour I wanted. I then selected the brush tool and painted over the whole image. Then I selected the eraser and set the size to 1200px and 0% hardness. I then erased the center of the image where the plant is and changes the opacity level to 14% so that the pink colour was quite faint around the edge but still visible. I did this because I wanted to create the warm tone and at the same time bring out the pink in the plant because I thought the image was quite yellow and green. I then flattened the image.
Beast

This is the original image. I want to try and darken it a little bit and make the spiderweb really stand out, because at the moment the spiderweb is kind of a similar colour to the background and it all looks quite grey. I also want to try and make it look slightly creepy.
 Image> Adjustments> Brightness & Contrast. I changed the contrast to 100 because this really made the spiderweb stand out against the dark in the background. I left the brightness at 0 because I didn't want the image any lighter and if I lowered the brightness, then the spiderweb would become less visible.  Image> Adjustments> Vibrance. I lowered the saturation to -25 so that the green at the bottom of the page was less bright and standing out but still green. I left the vibrancy the same because I didn't think it looked any better with it raised or lowered.  I then wanted to apply a High Pass filter to the image so I duplicated the layer...  ...and changed the blending mode to overlay...  ...and then i applied the High Pass filter. Filter> Other> High Pass. I set the Radius to 4.0 pixels because this was the sharpest I could get the image before it started to blur around the edges. 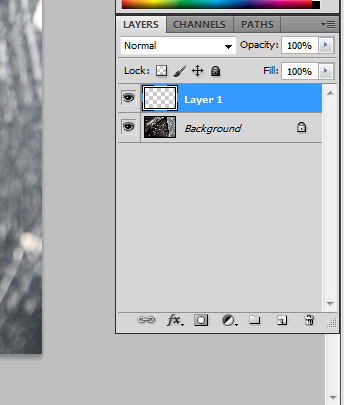 I then merged the layers and then created a new layer.  I then selected the brush tool and painted over the whole image with the colour black. I then selected the eraser tool and made it size 1200px and 0% hardness so that the black would fade into the image, and erased in the middle so you could see the spiderweb underneath. I also changed the opacity to 65% so that the black was more subtle on the image. I then flattened the image.
I'm pleased with how both my images look because it think they represent beauty and beast and I think they work well together because of the contrast of colours and they both have colour painted around the edges.
In my Beauty image the tones are really warm and inviting. This can make an image quite comforting. I also really like the sharpness in the image because you can see all the fine details in the image and all the rain drops and spider webs. I think the original image looks really pale and dull (which is mainly because of the weather because the sky was grey and it had been raining) so I am pleased with the changes I made using Photoshop. If I were to edit this image again, I might make the image less pink as you can see the pink around the edges. I think I should have made the opacity lower so that it was less visible and more subtle. Although my beast image is mainly grey and black, I think it still has warm tones because of the brown tint that it has and because it it quite dark. Also because I left the green in the image and it is still visible in the image. I really like how the spider web stands out against the dark background, and I think that because it was raining the spider wed has more detail and is even more visible. If I was to edit the image again then i would probably try and make the image look warmer by either changing the Hue or adding a a new layer over the top with a warm brown and them editing the opacity so that it just has a slight colour to it and then use a large eraser with 0% hardness and erase the main parts like the spider web so that it would still be white clear lines. I think the images have similarities but I think if I were to do this task again then I would try and make the two images have similar content (i.e. beauty - Spider Web, beast - Spider) and not just the effect that I apply. Overall I'm pleased with the result. |
No comments:
Post a Comment